Composting 101: How to Start Composting at Home
Composting is a simple and effective way to reduce waste while enriching your garden or houseplants. By turning organic materials into nutrient-rich compost, you contribute to a healthier environment and promote sustainable living. This guide will walk you through the basics of composting, providing practical advice for getting started at home.
1. What Is Composting?
Composting is the natural process of breaking down organic matter, such as food scraps and yard waste, into a nutrient-rich soil amendment called compost. This process involves the decomposition of materials by microorganisms, fungi, and other decomposers, turning waste into valuable compost that can enrich soil and support plant growth.
2. Why Is Composting Important?
Composting offers numerous benefits for both the environment and gardening:
- Reduces Waste: Composting diverts organic materials from landfills, reducing the overall volume of waste and decreasing greenhouse gas emissions.
- Enhances Soil Health: Compost improves soil structure, fertility, and moisture retention, which can lead to healthier plants and gardens.
- Saves Money: By creating your own compost, you can reduce the need for chemical fertilizers and soil amendments, saving money in the long run.
3. What Can Be Composted?
Understanding what materials are compostable is crucial for successful composting. Here’s a breakdown of suitable materials:
Green Materials (Nitrogen-Rich)
These materials provide essential nutrients for the composting process:
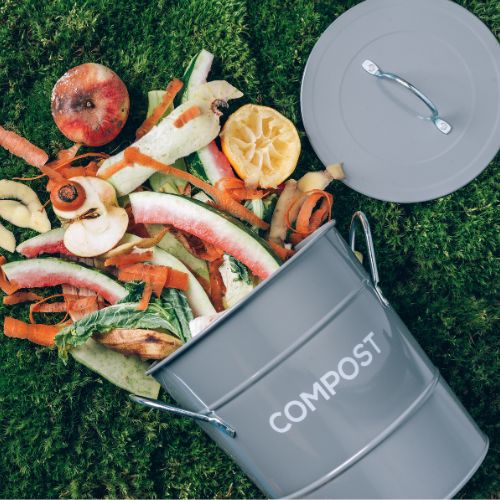
- Fruit and vegetable scraps
- Coffee grounds and filters
- Grass clippings
- Green leaves and plant trimmings
- Eggshells
Brown Materials (Carbon-Rich)
These materials help provide structure and aeration to the compost:
- Dry leaves
- Straw or hay
- Shredded newspaper and cardboard
- Wood chips or sawdust
Note: Avoid composting meat, dairy, oily foods, and pet waste, as these can attract pests and create unpleasant odors.
4. How to Start Composting at Home
Starting a composting system at home is straightforward. Here’s a step-by-step guide:
Step 1: Choose a Composting Method
There are several methods to choose from, depending on your space and preferences:
- Compost Bin: A designated bin keeps materials contained and makes it easy to turn and aerate the compost.
-
- Compost Pile: If you have ample outdoor space, you can create a compost pile directly on the ground. This method allows for larger quantities of compost but may require more effort to maintain.
- Worm Composting (Vermicomposting): This method involves using worms to break down organic materials, making it suitable for indoor composting, particularly in small spaces. It produces a nutrient-rich compost called worm castings.
Step 2: Gather Your Materials
Once you’ve chosen your composting method, start collecting the materials you’ll need:
- Container: For a compost bin, choose one that is well-ventilated and easy to access. You can purchase one or make your own from wood pallets or wire mesh.
- Green and Brown Materials: Keep a balance of green and brown materials in your compost. A good rule of thumb is to use three parts brown materials to one part green materials.
Step 3: Build Your Compost
Layer your materials in your compost bin or pile:
- Start with Brown Materials: Begin with a layer of brown materials at the bottom to help with aeration.
- Add Green Materials: Layer in your green materials, ensuring a mix of different types for diversity.
- Continue Layering: Alternate between green and brown materials until the bin or pile is full. Aim for a height of at least three feet for effective composting.
Step 4: Maintain Your Compost
Proper maintenance will speed up the composting process and ensure a healthy compost:
- Aerate Regularly: Turn your compost pile or bin every few weeks with a pitchfork or shovel to introduce oxygen, which is essential for decomposition. If using worms, gently mix the top layers without disturbing them too much.
- Monitor Moisture: The compost should be damp but not soggy. If it’s too dry, add water; if it’s too wet, add more brown materials to absorb excess moisture.
- Watch for Odors: A properly maintained compost should have a pleasant, earthy smell. If it smells rotten, it may need more oxygen or brown materials.
5. How Long Does Composting Take?
The composting process can take anywhere from a few months to a year, depending on several factors, including:
- Temperature: Warmer conditions can accelerate decomposition.
- Material Size: Smaller pieces break down faster, so chop or shred materials when possible.
- Aeration: Regularly turning the compost helps speed up the process.
6. When Is Compost Ready?
You’ll know your compost is ready when it resembles dark, crumbly soil and has a pleasant, earthy smell. It should no longer have recognizable food scraps or materials.
7. How to Use Your Compost
Once your compost is ready, you can use it in various ways:
- Garden Soil: Mix compost into garden beds to improve soil structure and nutrient content.
- Potted Plants: Use compost as a natural fertilizer for houseplants or container gardens.
- Lawn Topdressing: Spread a thin layer of compost on your lawn to enhance growth and health.
8. Tips for Successful Composting
- Keep It Simple: Don’t feel pressured to follow strict rules. Start with what you have and adapt as you learn.
- Stay Balanced: Aim for a good mix of greens and browns, as this balance is crucial for efficient composting.
- Educate Yourself: Read up on composting techniques and best practices to refine your skills over time.


